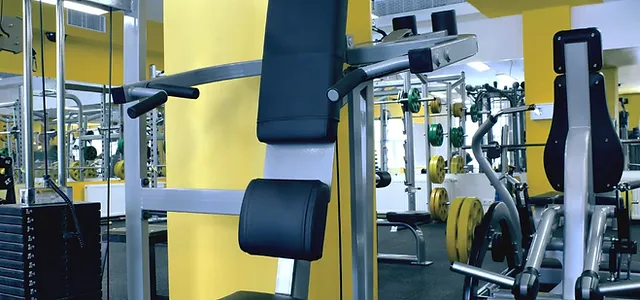
Assembling fitness equipment can be an exciting yet challenging task. Whether you’re setting up a treadmill, stationary bike, or a multi-gym system, proper assembly ensures safety, performance, and longevity. However, mistakes during the process can lead to equipment malfunctions, injuries, or unnecessary frustrations. To help you avoid these pitfalls, we’ve compiled a comprehensive guide with essential fitness equipment assembly tips and tricks.
Why Proper Fitness Equipment Assembly Matters
Safety First
Improperly assembled equipment can result in loose parts, tipping hazards, or unstable structures, putting users at risk.
Optimal Performance
Fitness machines work best when all parts are securely and correctly installed. Incorrect assembly can compromise functionality, leading to inefficiencies.
Prolonged Equipment Life
By ensuring accurate assembly, you reduce wear and tear caused by improper alignment or loose components.
Common Mistakes to Avoid During Fitness Equipment Assembly
Ignoring the Instruction Manual
Mistake: Skipping or glancing over the manual often leads to errors.
Solution: Read the manual thoroughly before starting. Highlight crucial steps and understand the assembly sequence.
Using Incorrect Tools
Mistake: Improvising with the wrong tools can damage parts or delay the process.
Solution: Gather all required tools beforehand, such as wrenches, screwdrivers, or Allen keys.
Rushing Through the Process
Mistake: Hurrying to complete the assembly increases the chances of errors.
Solution: Allocate sufficient time for assembly. Rushing can lead to missing steps or improperly secured parts.
Misplacing or Losing Small Parts
Mistake: Failing to organize screws, nuts, or bolts can create confusion.
Solution: Use labeled containers or small trays to sort components.
Over-Tightening Screws and Bolts
Mistake: Applying excessive force can strip threads or damage parts.
Solution: Tighten components until secure but avoid overdoing it. Follow torque specifications if provided.
Incorrect Placement of Parts
Mistake: Installing components in the wrong orientation leads to misalignment.
Solution: Double-check each step with the diagrams in the manual.
Assembling in the Wrong Location
Mistake: Assembling equipment in tight or unsuitable spaces can hinder movement or transport.
Solution: Assemble the equipment in its intended location or in a spacious area where it can easily be moved.
Ignoring Weight Limits and Stability Requirements
Mistake: Neglecting weight capacity or stability during assembly increases risks.
Solution: Ensure the equipment is placed on a flat, stable surface and check the weight limits in the manual.
Fitness Equipment Assembly Tips and Tricks
Prepare Before You Begin
- Create Space: Clear the area to provide ample room for assembly.
- Organize Tools and Parts: Lay out all tools and components systematically.
- Read the Manual: Familiarize yourself with the steps and identify tricky sections.
Follow a Step-by-Step Approach
- Start with the base or frame and gradually add components as per the instructions.
- Avoid skipping steps, even if they seem trivial.
Work with a Partner
Some fitness equipment pieces are heavy or require simultaneous handling of multiple parts. Having a partner can make the process easier and safer.
Use Proper Lighting
Ensure the assembly area is well-lit to avoid missing small details or components.
Secure Moving Parts
Ensure all bolts, screws, and fasteners are properly tightened. Use thread-locking adhesives where recommended.
Adjust and Test After Assembly
- Verify the stability and alignment of the equipment.
- Check for squeaks, wobbles, or loose parts during a test run.
Keep Extra Parts Handy
Sometimes, manufacturers include extra screws or washers. Save these for future use.
Special Considerations for Specific Equipment
Treadmills
- Ensure the running belt is properly aligned and tensioned.
- Place the treadmill on a mat to protect flooring and reduce noise.
Stationary Bikes
- Adjust the seat and handlebar height during assembly for a proper ergonomic fit.
- Ensure pedals are securely fastened.
Multi-Gym Systems
- Identify and organize cables, as they can be tricky to thread.
- Follow the manual closely to avoid incorrect pulley alignments.
Rowing Machines
- Test the tension on the rowing cord or chain after assembly.
- Check for smooth gliding of the seat.
Professional Assembly Services: Are They Worth It?
If DIY assembly feels overwhelming, hiring a professional assembly service can save time and effort. Here are some benefits:
- Expertise: Professionals are trained to assemble various types of fitness equipment efficiently.
- Time-Saving: Avoid the trial-and-error process of DIY assembly.
- Peace of Mind: Ensure your equipment is safely and correctly assembled.
Maintaining Your Fitness Equipment Post-Assembly
Regular Inspections
Check for loose screws, bolts, or wear and tear every month.
Lubrication
Apply lubricant to moving parts such as treadmill belts or stationary bike chains to prevent friction.
Cleaning
Keep your equipment clean by wiping it down after use. Avoid using harsh chemicals.
Conclusion
Proper assembly of fitness equipment is crucial for ensuring safety, functionality, and durability. By avoiding common mistakes and following the tips and tricks outlined in this guide, you can set up your equipment with confidence. Whether you’re assembling a simple dumbbell rack or a complex multi-gym system, attention to detail and patience are your best tools.
If in doubt, don’t hesitate to consult professional assembly services to guarantee a hassle-free experience. With well-assembled equipment, you can focus on what truly matters: achieving your fitness goals!
