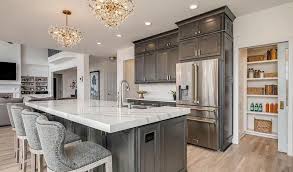
Are you looking to add a touch of elegance and sophistication to your kitchen or bathroom cabinets? One effective way to elevate the appearance of your cabinetry is by incorporating decorative cabinet molding. Proper cabinet molding installation can completely change the look of your space, giving it a custom, high-end feel without the need for a full remodel.
Why Add Cabinet Molding?
Cabinet molding, also known as crown molding or decorative trim, creates a visual transition between the top of your cabinets and the ceiling. It helps hide imperfections, gaps, or uneven edges, and adds architectural interest. Whether you prefer a sleek modern style or a traditional decorative look, the right cabinet molding can complement your décor seamlessly.
Steps to a Successful Cabinet Molding Installation
Executing a flawless cabinet molding installation requires some planning, proper tools, and attention to detail. Here’s a step-by-step guide to help you get started:
1. Measure and Select Molding
Begin by measuring the perimeter of your cabinets’ tops. Choose molding that fits your style and dimensions. Molding options vary from simple flat trims to intricate decorative crown styles, so consider your overall design theme.
2. Gather Supplies and Tools
- Measuring tape
- Mitre saw
- Level
- Wood glue and nails or finishing nails
- Caulk and paint or stain (if needed)
- Sandpaper
3. Cut the Molding Accurately
Using a mitre saw, make precise angled cuts to ensure your corners align perfectly. Corner joints often require mitered cuts at 45 degrees, but you can also opt for coped joints for a more seamless look.
4. Attach the Molding Securely
Apply wood glue to the back of each piece, position it in place, and nail it into the cabinet frame. Use a level to check the alignment as you go along. Be cautious to avoid over-nailing, which could crack the molding.
5. Finish and Paint
Fill nail holes with wood putty, sand smoothly, and then paint or stain the molding to match or contrast with your cabinets. The final touch will make your project look polished and professional.
Hire Experts or Do It Yourself?
If you are unsure about tackling cabinet molding installation on your own, consider consulting professional carpenters or handyman services. However, with patience and proper guidance, many homeowners find this to be a rewarding DIY project that saves money and adds personal flair to their home.
Additional Tips for a Stunning Finish
- Always double-check your measurements before cutting.
- Use painter’s tape to protect your cabinets during painting or staining.
- Take your time with the angles to ensure clean, seamless corners.
- Consider adding LED strip lighting beneath the molding for a modern touch.
Enhancing your cabinets with beautiful molding is a simple yet impactful improvement. Not only does it increase the aesthetic appeal of your space, but it also adds value to your home. Whether you choose to handle the cabinet molding installation yourself or hire a professional, the result will be a customized, stylish look that reflects your personal taste.
For more DIY tips and inspiration, visit the Dream of DIY homepage and start transforming your home today!
